Tutor
Your practice at a glance
Choose any step. The order is a guide, not a requirement.
Set up your practice
Sign in or create an account
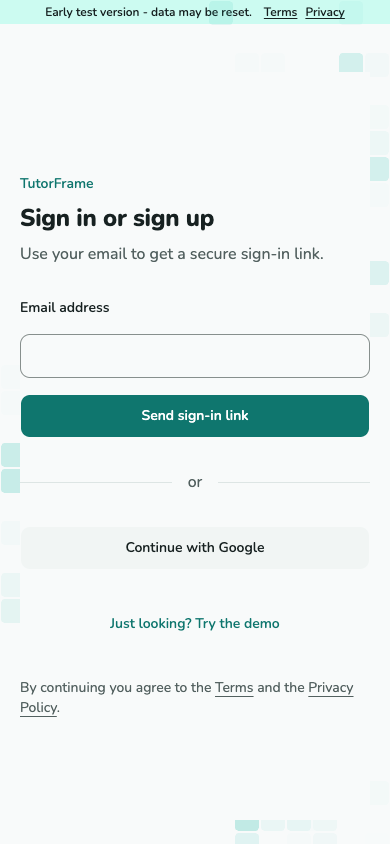
Choose Google or enter your email. Open the sign-in link from the newest email. A new account first completes Introduce yourself, then practice setup.
Screenshot not available yet.
Sign-in screen with email and Google options.
A-02 · Sign in or create an account Introduce yourself
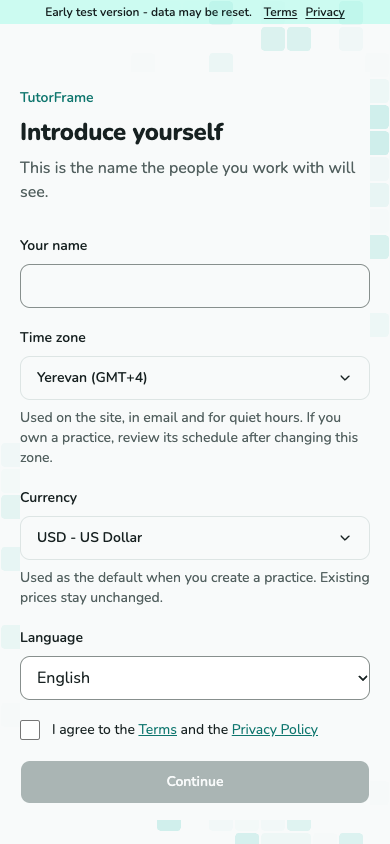
Enter your name and check your time zone. Read the Terms and Privacy Policy, tick the agreement and choose Continue. This step is required before setting up a new practice.
Screenshot not available yet.
Introduce yourself form with name, time zone and agreement checkbox.
A-10 - name, time zone and agreement before practice setup. Name your practice
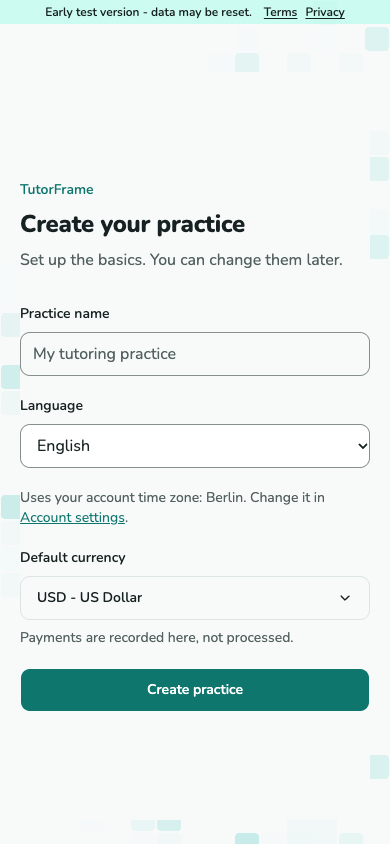
Enter a practice name, choose its language and currency, then select Create practice. Your practice uses your account time zone; change it in Account settings. Getting started opens with six optional steps.
Screenshot not available yet.
Practice setup form with name, language, currency and an account time zone explanation. Change the time zone in Account settings.
T-01 · Name your practice Choose where to start
Choose any step, record work already done, or go straight to Today. You can return from Help or your account menu, and hide the card from Today whenever you want.
Screenshot not available yet.
Getting started page with six linked steps, progress and a Hide from Today action.
T-47 - Getting started
Getting started
Choose any step
Getting started opens after you create your practice. Its six steps are suggestions, not requirements. Choose any destination or go straight to Today. Done means the practice already contains the relevant record.
Screenshot not available yet.
Getting started page with six linked steps, progress and a Hide from Today action.
T-47 - Getting started Set up what you need
The suggested order starts with Add students, Schedule a lesson, then Set prices. Add students opens the list with Add student and Add several. Each new row gets its own family. Set prices opens Default rules, with Services beside it. A default price rule, including zero, completes Set prices; a service alone does not. Every destination stays available in any order.
Screenshot not available yet.
Services list and the Add student form, the two places to prepare a practice.
T-26 and T-12 - services and students Schedule, then close a lesson
Choose Schedule lesson to open the lesson form. You can enter a new student, choose a service or use the default, and schedule before setting prices. After the lesson happens, close it from Today or its lesson card. Return through your account menu or Help to see the recorded progress. Completed rows keep their original numbers below unfinished rows.
Screenshot not available yet.
New lesson form with student, service, date and time.
T-04 and T-06 - schedule a lesson, then close it Record work already done
Choose Already did the work? Record it to open Record work directly. You do not need to create a lesson first. The Record work and income guide explains the entry and its payment choices.
Screenshot not available yet.
Record work form with amount, date, description and client.
T-45 - Record work Track a payment
Open Money and record money you have received: a payment from a payer, or income without a client. Payments are recorded here, not processed. Either completes this step; you do not need to invent a payment for free work.
Screenshot not available yet.
Money page with payers and the received and owed figures.
T-16, T-17 and T-18 - Money, payer and payment Review available results
Completed lessons and recorded work give you results to review in Statistics. This step becomes Done when that activity exists, even if you have not opened Statistics yet. Opening a guide or page does not record reading progress.
Screenshot not available yet.
Statistics page with lessons, attendance and money for a period.
T-24 - Statistics Keep the guide handy, or hide its card
Choose Hide from Today if you no longer need the Getting started card. This does not hide tasks, change your records or remove the guide. Getting started stays in Help and your account menu.
Screenshot not available yet.
Today page with the Getting started card above the list of tasks.
T-47 and T-02 - hide the card from Today
Add a student and invite them
Create the student card
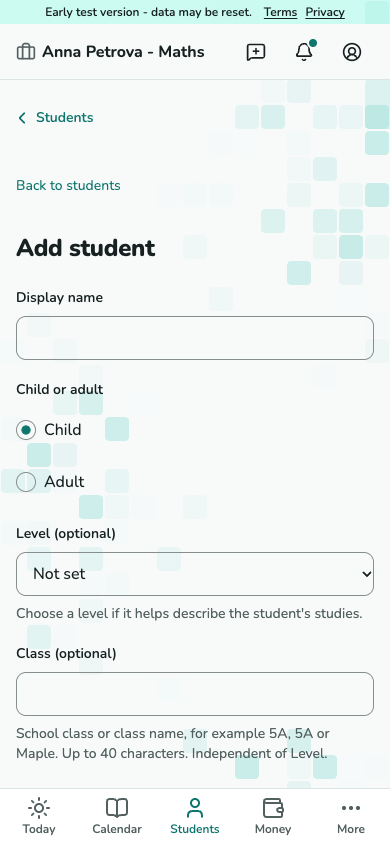
Open Students - Add student for one card, or Add several for a list of up to 50 students. Contacts are optional. A new family record is created for each student in this list. You can invite their parents later. Add students saves the whole list or none and shows the new student links.
Screenshot not available yet.
Add student form.
T-12 · Create the student card Invite the right person
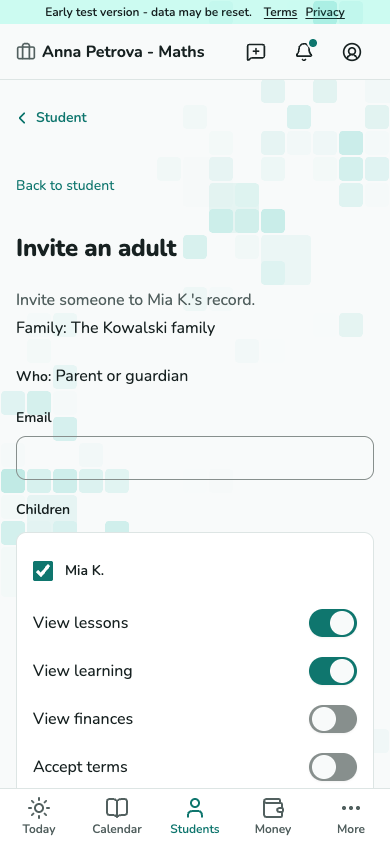
From the student card, choose Invite an adult for a child or invite the adult student. Enter their email, check the permissions shown, then send the invitation.
Screenshot not available yet.
Invitation form showing email and available permissions.
T-13 · Invite the right person
Agree on teaching terms
Add a service
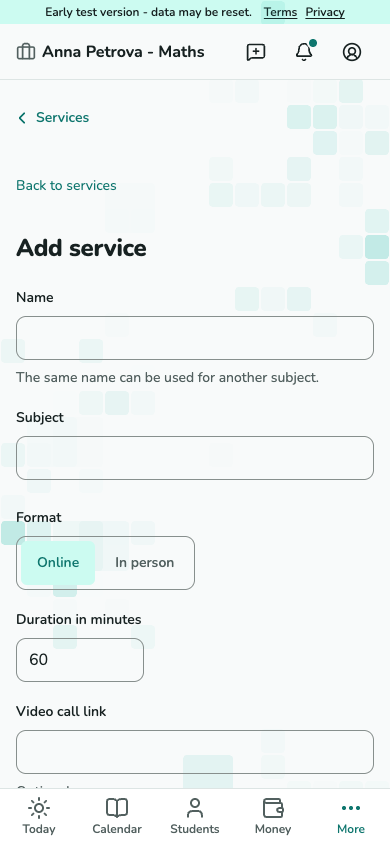
Lesson types are services. Create one in Practice settings → Services, or choose New service while entering a lesson. The lesson draft stays in place. Enter its name, subject, format and duration, plus a video call link or address if needed. After saving an active service, Connect students selects up to 50 students at once. Prices and rules come from your practice defaults, never from the service. Missing default rules must be set before connecting. A student's preferred currency can change the suggested currency.
Screenshot not available yet.
New service form with subject, format, duration and place fields.
T-26 - define what you teach. Enroll the student
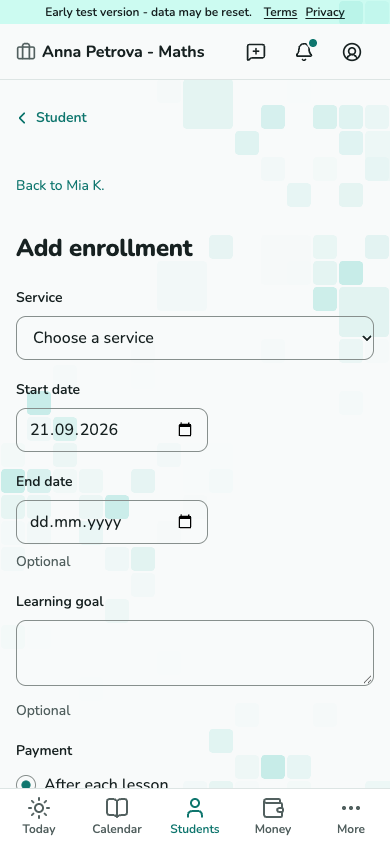
Connecting a student creates an enrollment, not a lesson. Enrollment starts on is the first day of that connection. Schedule a lesson separately and choose its date and time. On a student card, Add enrollment connects one active service. On a saved service, Connect students selects several active or paused students, then reviews the practice defaults. Each row starts Save draft. Send for acceptance needs an adult who can accept that student’s terms. Agreed outside the service needs a separate confirmation for that row. The save connects all selected students or none.
Screenshot not available yet.
Add enrollment form with service, start and end dates and learning goal.
T-11 - link the student to a service before setting terms. Set the price and rules
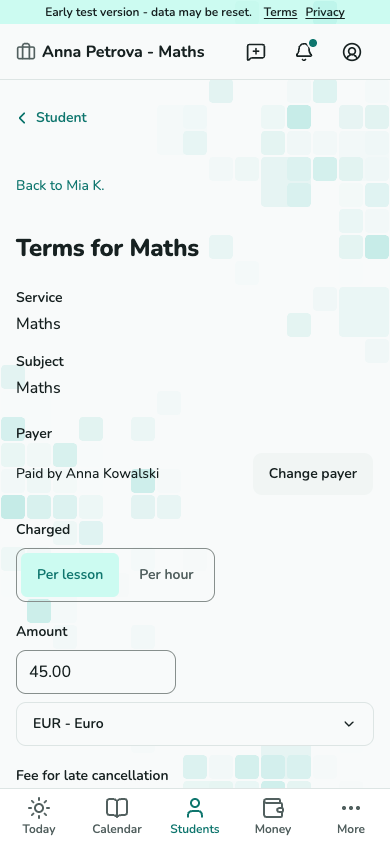
Check the amount, currency, cancellation fees, waiting time and start date. Save a draft, send it for acceptance, or mark it as agreed outside the service only if you have already agreed.
Screenshot not available yet.
Terms editor showing price and cancellation rules.
T-14 · Set the price and rules Check the agreement status
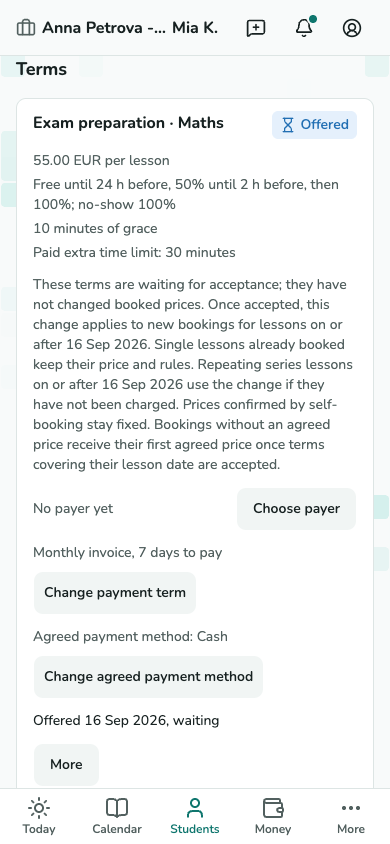
The Terms section shows each enrollment’s own status. A draft or offer is not accepted. Only the permitted person’s acceptance or your individually confirmed outside agreement accepts that row. A family answering one offer changes no sibling’s terms. Saved drafts and accepted terms keep their copied rules when defaults later change.
Screenshot not available yet.
Student Terms section with offered and accepted agreements.
T-11 · Check the agreement status Charge a student in another currency
For the practice default, open Practice settings → Default rules → Price → Default currency → Change. For one student, choose Preferred currency when adding or editing the student, or use Change preferred currency on the student page. This suggests a currency for new prices; it does not change agreed terms or recorded money. To change accepted terms from USD to EUR, open the student's Terms block → Offer new terms, choose EUR and enter the amount on the terms page, then send for acceptance or record an agreement made outside the service. Change price keeps the current currency. Statements and advances remain separate for each currency.
Screenshot not available yet.
Student currency preference, new terms and the practice default currency.
T-11 / T-14 / T-26 · Choose a currency for new prices
Schedule a lesson or a series
Choose where the lesson belongs
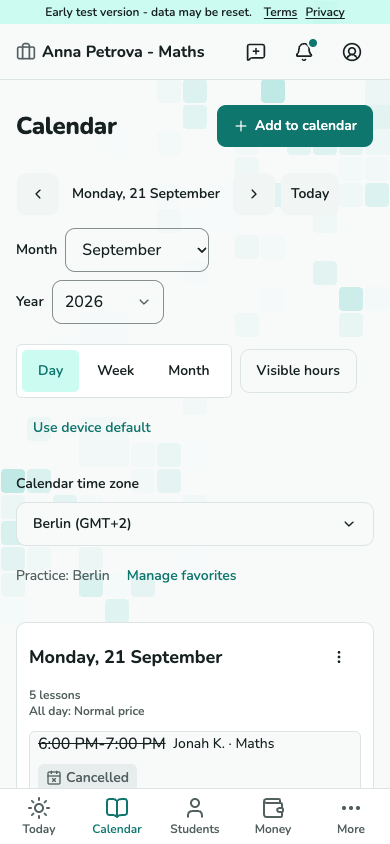
Open Calendar and select a free time, or choose Schedule from the student card. The new lesson form lets you choose the student and service.
Screenshot not available yet.
Tutor calendar with scheduled lesson tiles.
T-03 · Choose where the lesson belongs 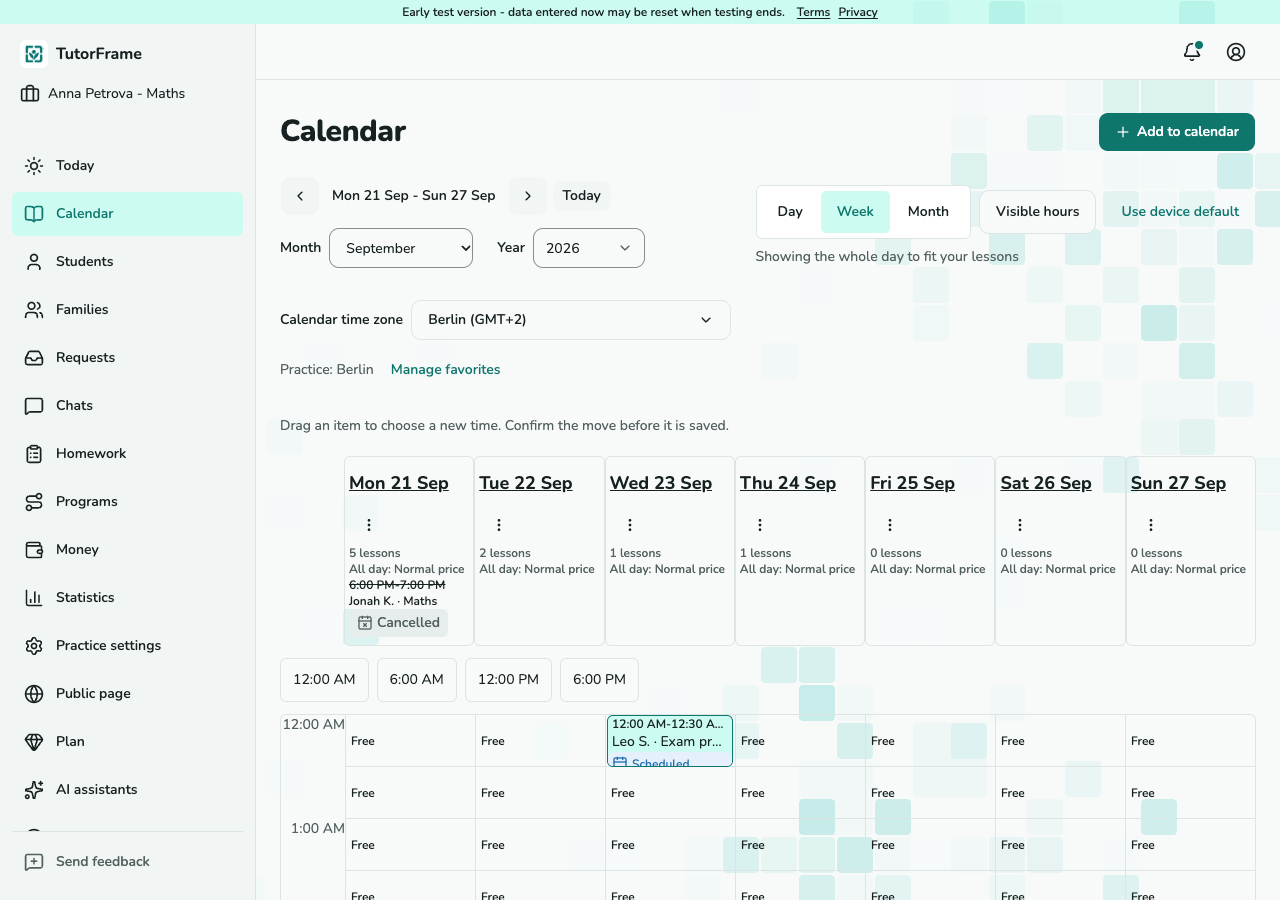
Screenshot not available yet.
Tutor calendar with scheduled lesson tiles.
T-03 · Choose where the lesson belongs (desktop) Set the time and repeat
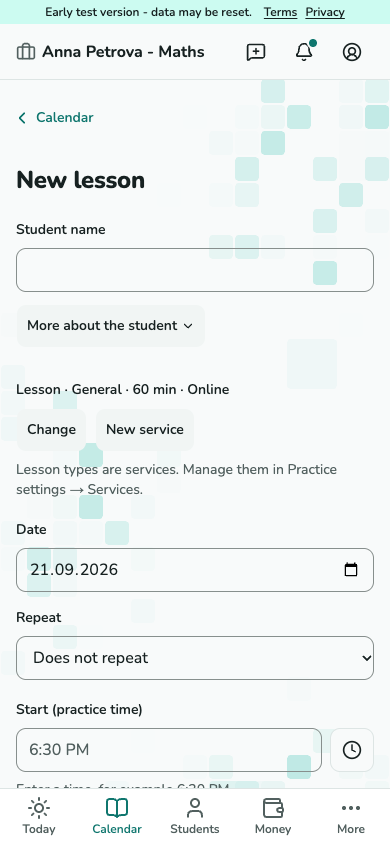
Choose an existing student or enter a new name, select a service or use the default, then choose Date and Repeat together. Weekly, fortnightly and monthly schedules work before a student or enrollment exists. Review the first dates, then save once to create the missing student, family and enrollment with the schedule. Existing enrollment dates stay unchanged. Introductory sessions do not repeat.
Screenshot not available yet.
New lesson form with student, service and time fields.
T-04 · Set the time and repeat 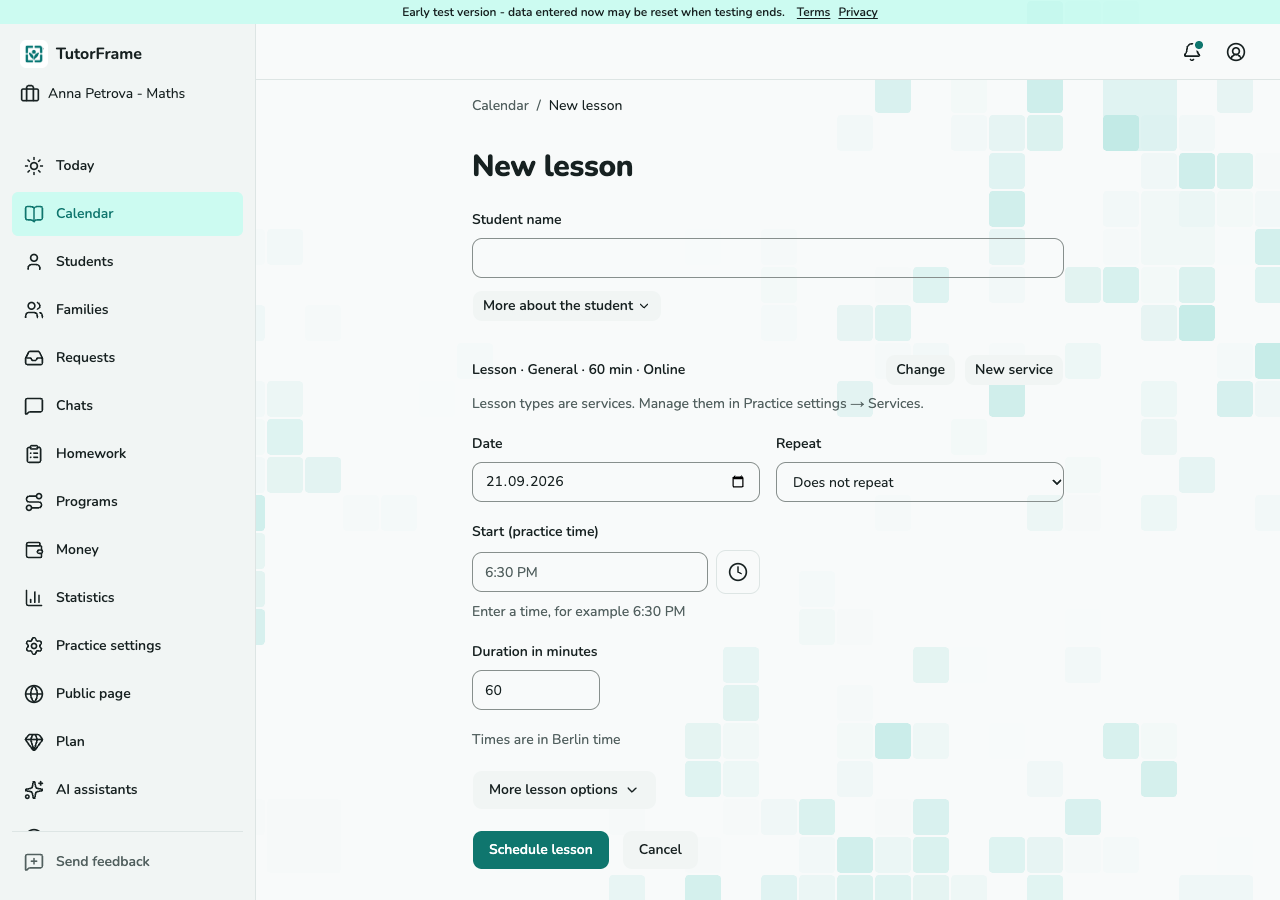
Screenshot not available yet.
New lesson form with student, service and time fields.
T-04 · Set the time and repeat (desktop)
Change a weekly series
Choose the scope
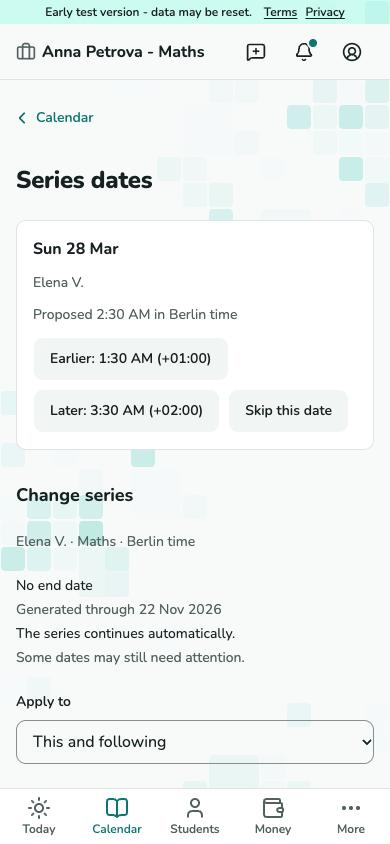
Open the series from its lesson. Set Apply to, then adjust the repeat, time, place or end date. Past lessons are kept.
Screenshot not available yet.
Series editor with Apply to and schedule fields.
T-09 · Choose the scope Preview before applying
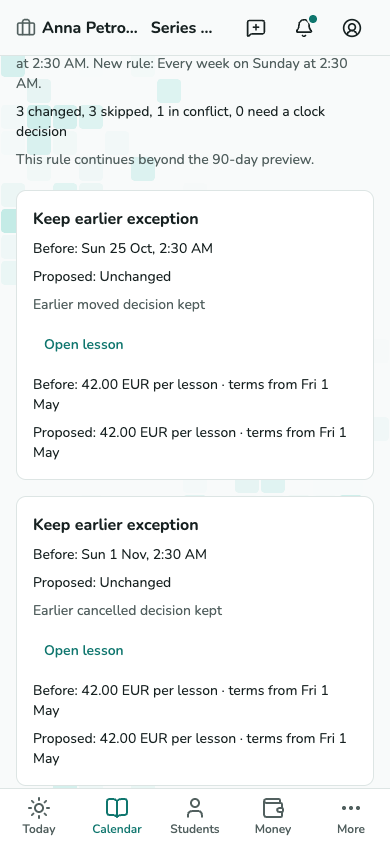
Select Preview changes. Check changed dates, retained exceptions and conflicts. Apply changes only when the preview matches your intention; review the result groups afterwards.
Screenshot not available yet.
Series change preview listing changed, skipped and conflicting dates.
T-09 · Preview before applying
Run and close a lesson
Open the lesson
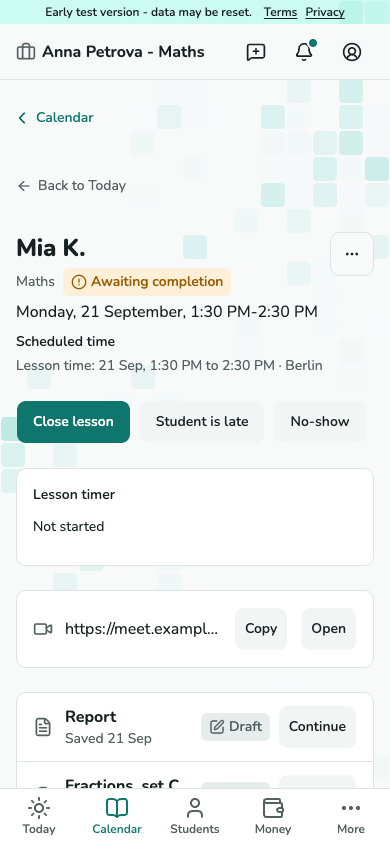
Use Today or Calendar to open the lesson. Its card holds the meeting link or address, attendance actions and learning records. Waiting for the student is a separate mark; telling the family requires its own action.
Screenshot not available yet.
Lesson card with meeting details and lesson actions.
T-05 · Open the lesson Check attendance and the charge
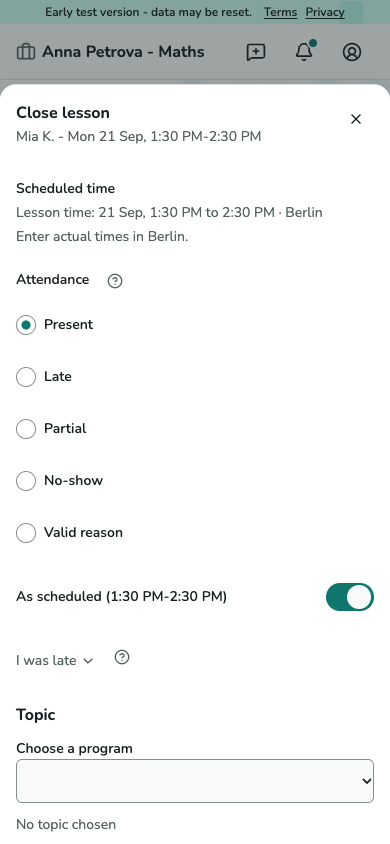
Select Close lesson. Review attendance and recorded time, then check the charge preview before confirming. An early end uses the agreed charging rules; missing terms leave the charge waiting.
Screenshot not available yet.
Close lesson sheet with attendance, recorded time and charge preview.
T-06 · Check attendance and the charge
Cancel a lesson
Check the cancellation
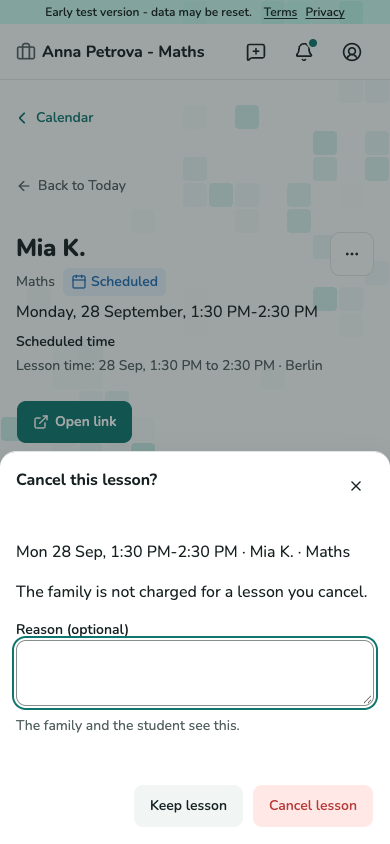
Open the lesson’s More actions menu and choose Cancel lesson. Review the reason and confirm. A tutor cancellation adds no family fee; money already paid remains an advance.
Screenshot not available yet.
Tutor cancellation dialog with reason and confirmation.
T-07 · Check the cancellation
Move one lesson
Choose the new time
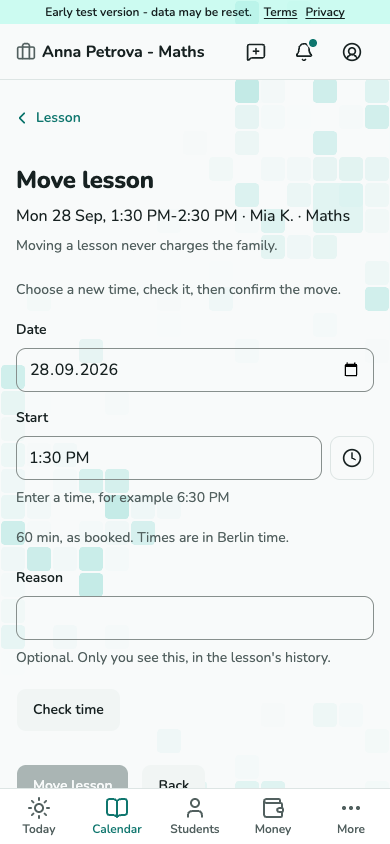
Open Move lesson from the lesson or its calendar dialog, or drag the lesson to a new time on the calendar. Choose the new date and start, add a reason if you like, then press Move lesson: the lesson moves at once and keeps its identity and booked price. A clash is named under Start and nothing changes. The message after the move offers Undo, and so does the lesson. A series lesson moves alone; to change the whole series, use Change series.
Screenshot not available yet.
Move lesson form with date, start and reason.
T-08 · Choose the new time 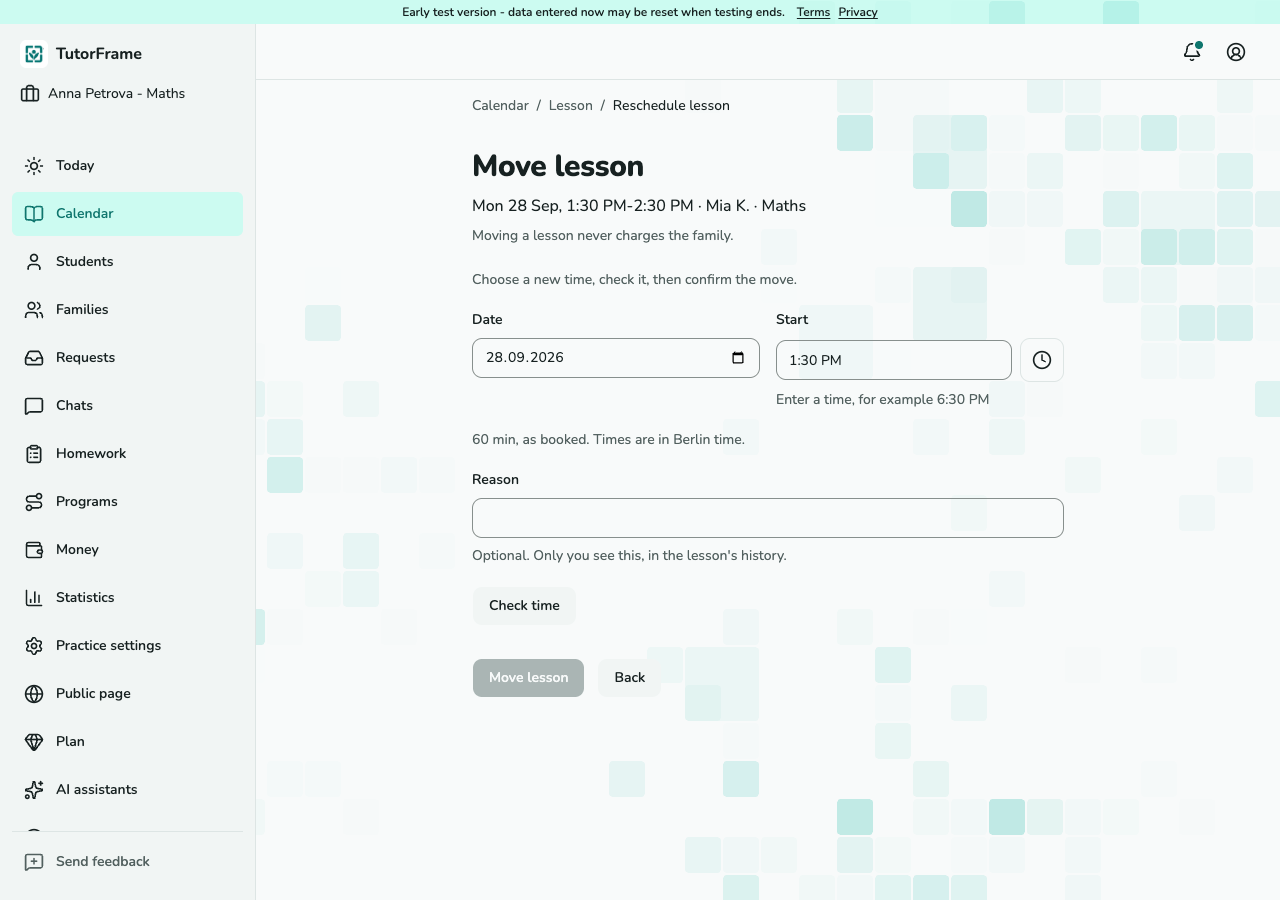
Screenshot not available yet.
Move lesson form with date, start and reason.
T-08 · Choose the new time (desktop)
Record a payment
Agree monthly payment
Open the family's Money page and choose Payment terms, or use Payment terms in the student's Money block. Set Monthly invoice separately for each relevant service and enter the agreed days to pay. Unpaid lessons remain visible as owed; while they wait for an invoice they are not overdue. Open the payer statement and send the invoice when ready, including at month end. Payment is due the agreed days after sending and becomes overdue the following day. Children share an invoice only when their charges belong to the same payer account and currency. Changing a term does not change earlier charges or sent invoices.
Screenshot not available yet.
Payment terms for each student's service.
T-11 and T-42 · Payment terms Record money you received
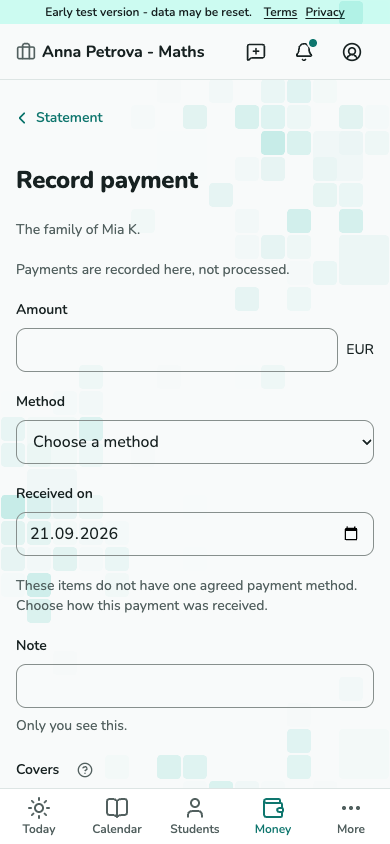
Open Money - the payer - Record payment, or Record payment on a lesson. Enter the amount, date and method. Check what it covers, then save. Payments happen outside TutorFrame.
Screenshot not available yet.
Record payment form with amount, received date and method.
T-18 · Record money you received Check debt and advance
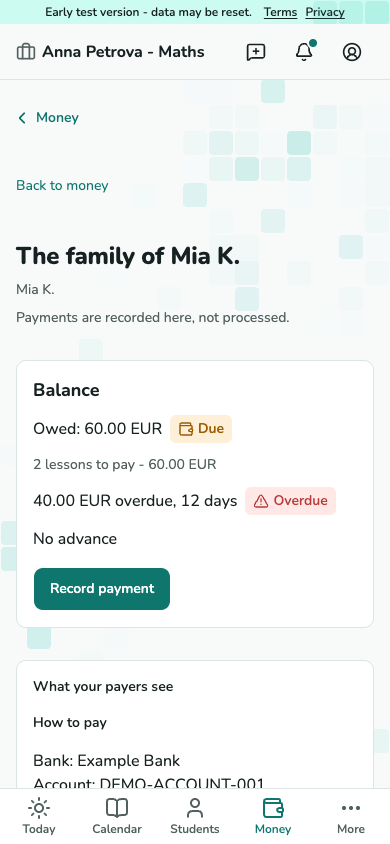
The statement separates charges, payments, debt and advance. Payments cover the oldest open debt first; anything left stays as an advance with this practice.
Screenshot not available yet.
Payer statement with balance and transaction history.
T-17 · Check debt and advance
Correct a lesson or money record
Correct a closed lesson
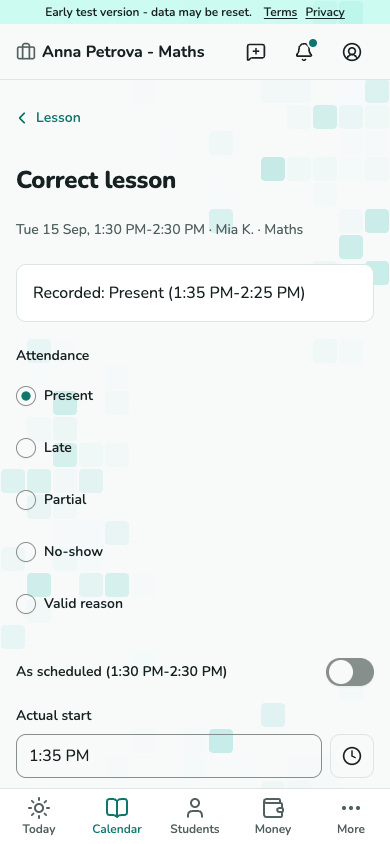
Open the closed lesson’s Change menu and choose the correction. Enter the corrected facts and a reason, review the money consequences, then confirm. The original stays in history.
Screenshot not available yet.
Closed lesson correction form and financial preview.
T-19 · Correct a closed lesson Reverse an incorrect payment
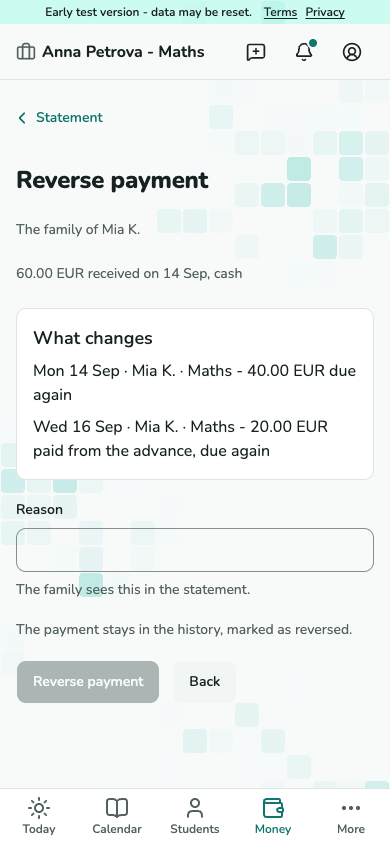
Open the payment in the payer statement and choose Reverse. Check which debts will reopen and give a reason before confirming.
Screenshot not available yet.
Payment reversal form showing debts that reopen.
T-19 · Reverse an incorrect payment Record an advance you returned
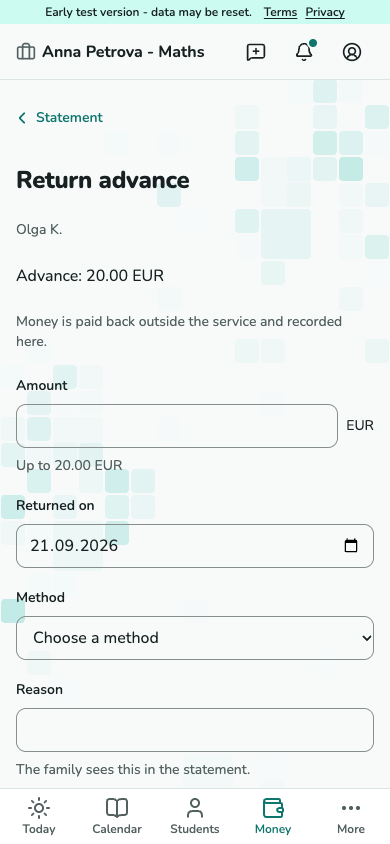
Return the money outside TutorFrame first. Choose Return advance on the payer statement, enter the amount, date, method and reason, then record the return.
Screenshot not available yet.
Return advance form with the available advance.
T-19 · Record an advance you returned
Assign and review homework
Publish an assignment
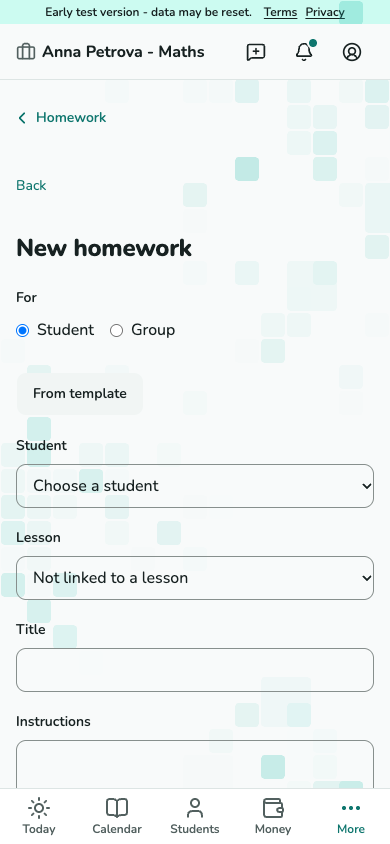
Choose Assign homework from a lesson, student card or Homework. Choose the student and enter a title; both are required. Add instructions, files, links and an optional due date. You can copy a template before publishing the independent assignment.
Screenshot not available yet.
Homework editor with student, instructions and due date.
T-21 · Publish an assignment Review the submitted answer
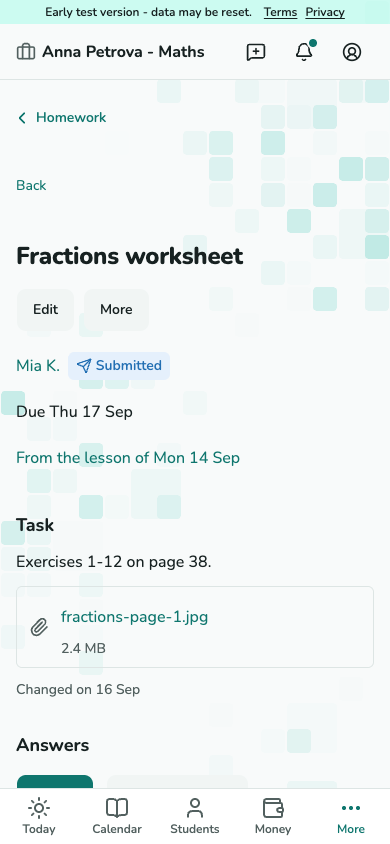
Open the assignment’s answers. Read the latest version and choose Accept or Request changes with specific feedback. A student’s Done status is a self-report, not your acceptance.
Screenshot not available yet.
Homework review showing answer versions and Accept or Request changes controls.
T-22 · Review the submitted answer
Publish a report and keep private notes
Choose the report’s readers
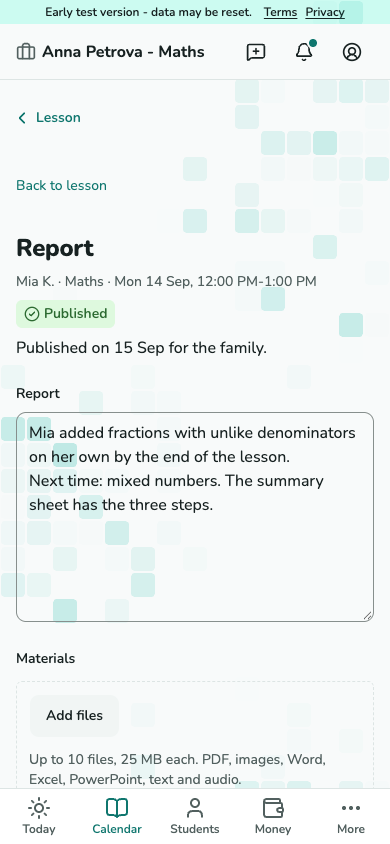
Open Write report on the lesson. Write the summary, add materials and check the audience. Save a draft or publish; later edits publish a new version. A minor’s report is shared with permitted adults.
Screenshot not available yet.
Report editor with text, materials and family audience.
T-23 · Choose the report’s readers Keep private notes separate
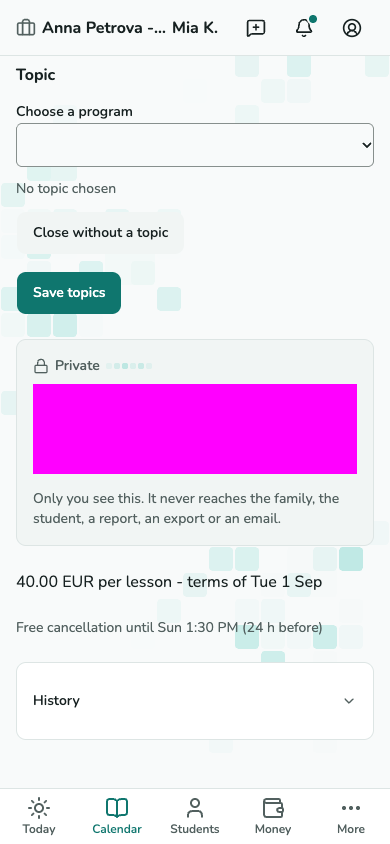
Use the lesson’s Private note block for your own teaching notes. Private notes never enter the published report, family or student screens, exports or email.
Screenshot not available yet.
Lesson card’s private note block.
T-05 · Keep private notes separate
Change a student’s price
Prepare the new price
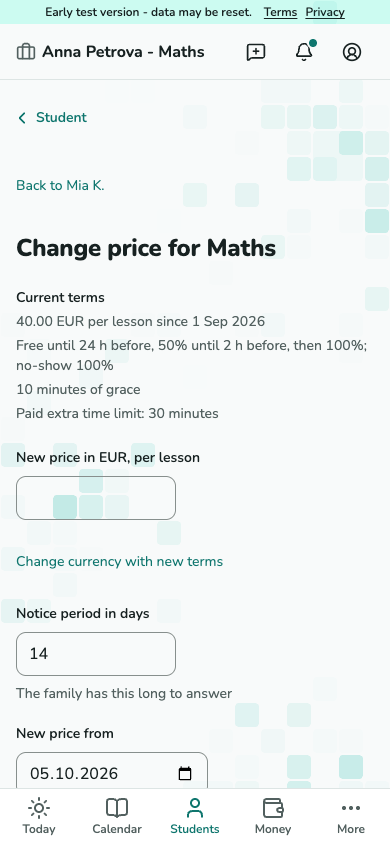
Choose Change price for the enrollment. Set the new price, start date and notice period. Check affected lessons: confirmed bookings keep their price. Send the offer or record an outside agreement.
Screenshot not available yet.
Price change form with current terms and affected lessons.
T-15 · Prepare the new price Follow up on the answer
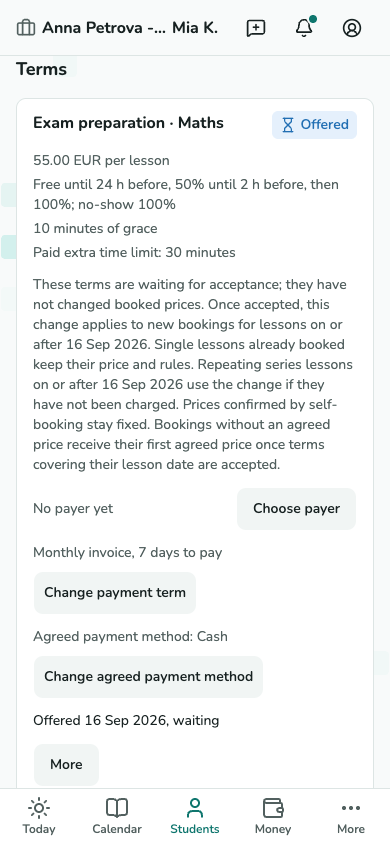
Check the offer in Terms. Silence does not accept the price: unanswered changes can block new lessons from the proposed day. Discuss a declined or expired offer with the family.
Screenshot not available yet.
Student terms showing a pending price change.
T-11 · Follow up on the answer
Plan a vacation
Add your dates
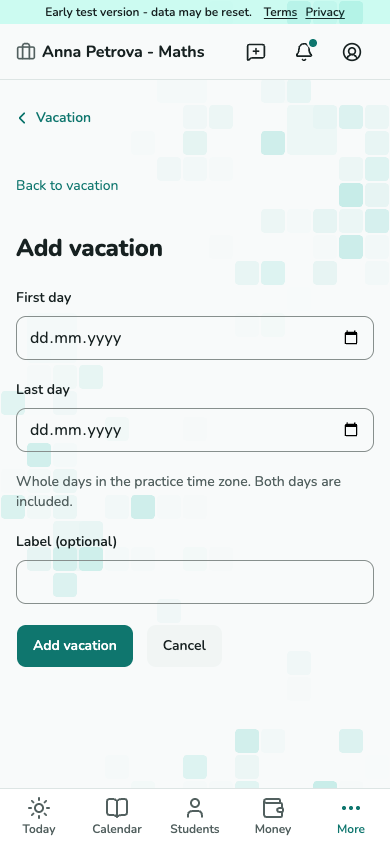
Open Settings - Vacation - Add vacation. Enter the date range and save. New lessons cannot be scheduled inside that absence.
Screenshot not available yet.
New vacation form with date range.
T-27 · Add your dates Decide about existing lessons
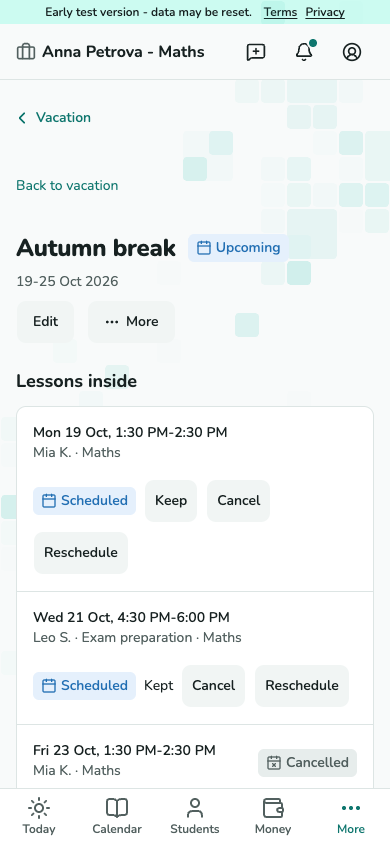
Open the vacation’s lesson list. Keep, cancel or reschedule each affected lesson. Adding a vacation never silently deletes lessons.
Screenshot not available yet.
Vacation detail listing lessons that need a decision.
T-27 · Decide about existing lessons
Manage a student’s access
Review the people with access
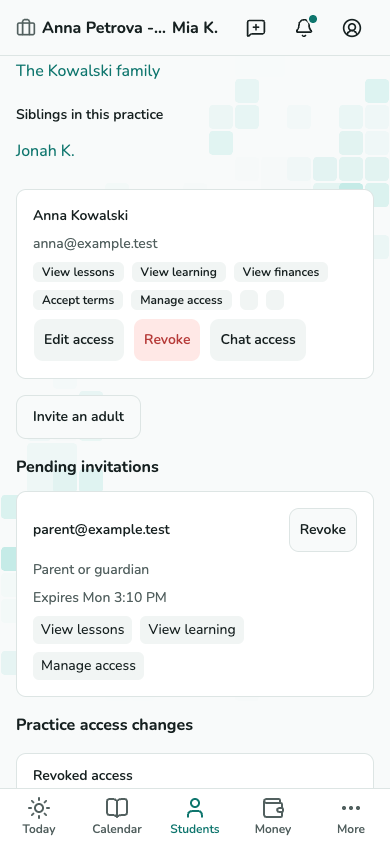
Open Family and access on the student card. Check each invitation and permission before changing or revoking it. Revoking your practice’s access does not remove the person from other practices.
Screenshot not available yet.
Student card’s family and access section.
T-11 · Review the people with access
Pause or finish teaching a student
Choose what happens next
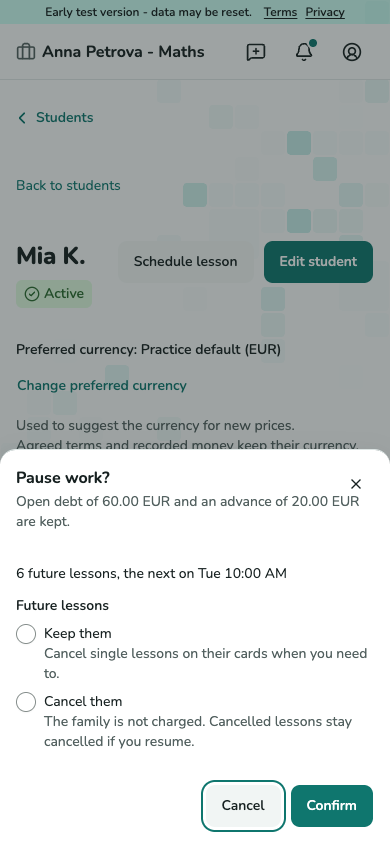
Open More on the student card and choose Pause or Finish. For a pause, choose whether future lessons stay or are cancelled; finishing cancels them. Read the debt and advance warning before confirming.
Screenshot not available yet.
Pause work dialog showing future lesson choices and retained balance.
T-11 · Choose what happens next Settle any remaining balance
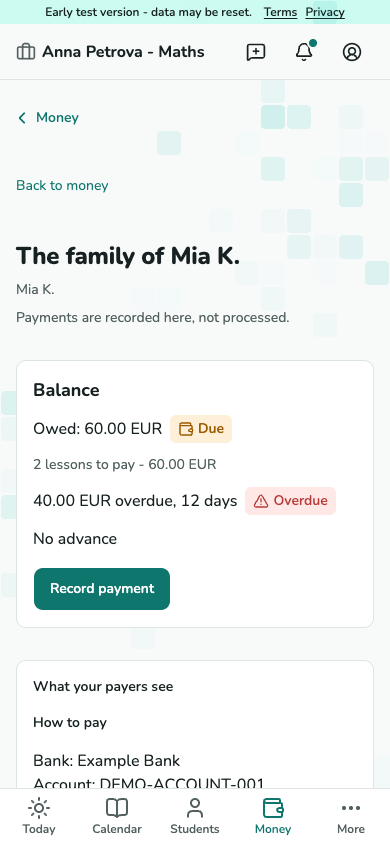
Use the payer statement to record payments or an advance return. Pausing or finishing keeps the student’s teaching history, debt and advance.
Screenshot not available yet.
Payer statement with retained debt and advance.
T-17 · Settle any remaining balance
Subscribe to your lesson calendar
Create a personal calendar link
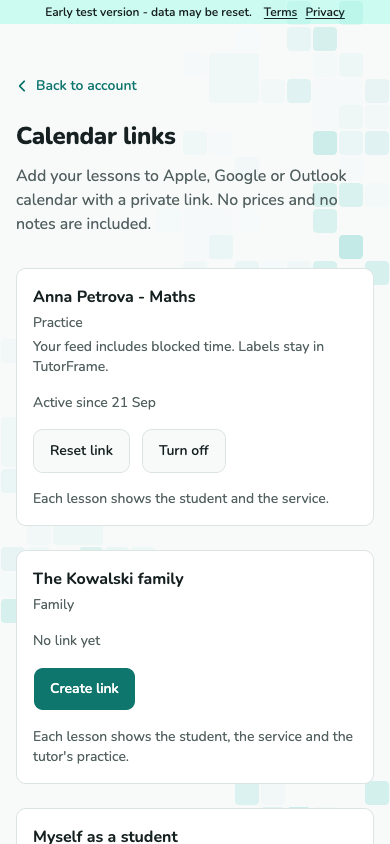
Open Account settings - Calendar links. Choose Create link for the context you want, then add that private link to your calendar app. Treat it as a password and share it only with people you trust.
Screenshot not available yet.
Calendar links screen showing context rows without secret links.
A-07 · Create a personal calendar link Reset or turn off a link
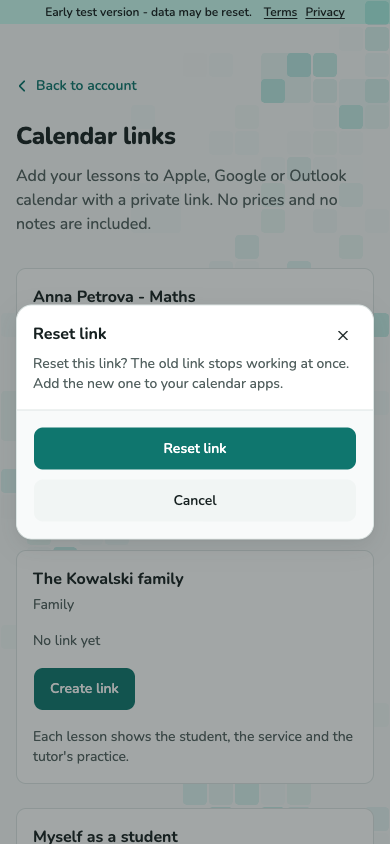
Use Reset link if it was shared accidentally, or Turn off to stop updates. The old link stops working immediately; calendar apps may keep lessons they already imported.
Screenshot not available yet.
Reset calendar link confirmation explaining that the old link stops working.
A-07 · Reset or turn off a link
Follow reminders and automatic tasks
Check Today for decisions
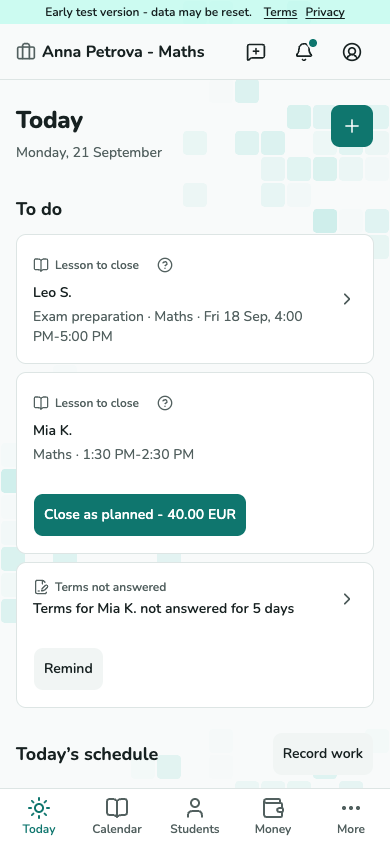
Today gathers lessons to close, overdue reports and other decisions. Open an item to act. Series expansion and reminders run automatically, but closing a lesson still needs your decision.
Screenshot not available yet.
Today screen with lessons and tasks.
T-02 · Check Today for decisions Read and manage notifications
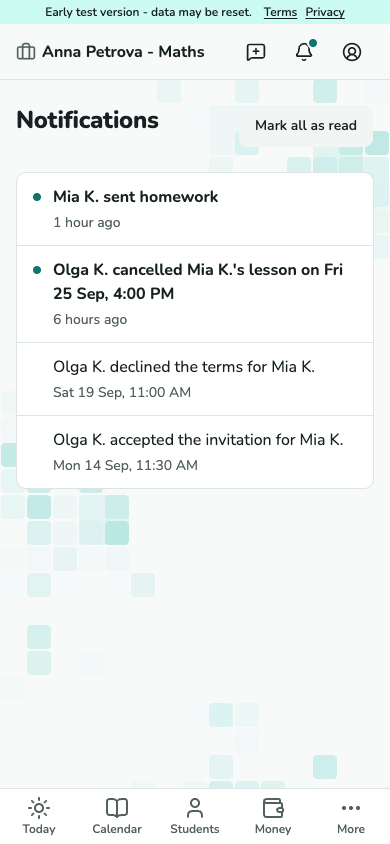
Open Notifications to read lesson, invitation and learning updates. Open the relevant item, mark it read or mark all as read. Jobs check the current state before sending a reminder.
Screenshot not available yet.
Practice notifications list with unread indicators.
A-08 · Read and manage notifications
Switch between your contexts
Choose the context you need
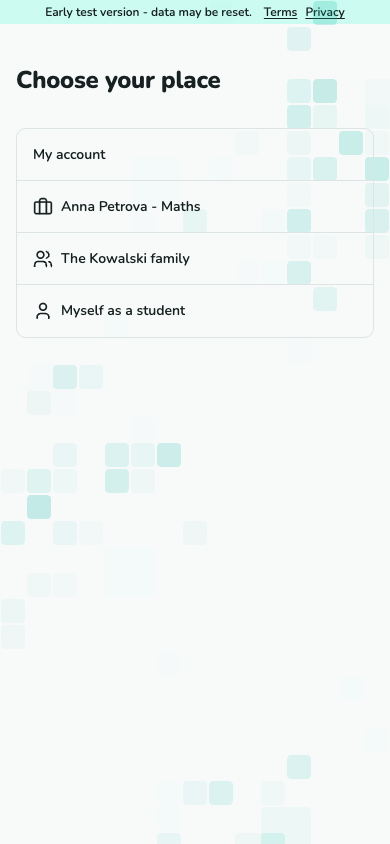
Choose a practice, a family or your student context. On a phone, open the account menu to reach the switcher. The active context’s name and address identify whose records you are viewing.
Screenshot not available yet.
Context switcher listing practice, family and student entries.
A-05 · Choose the context you need 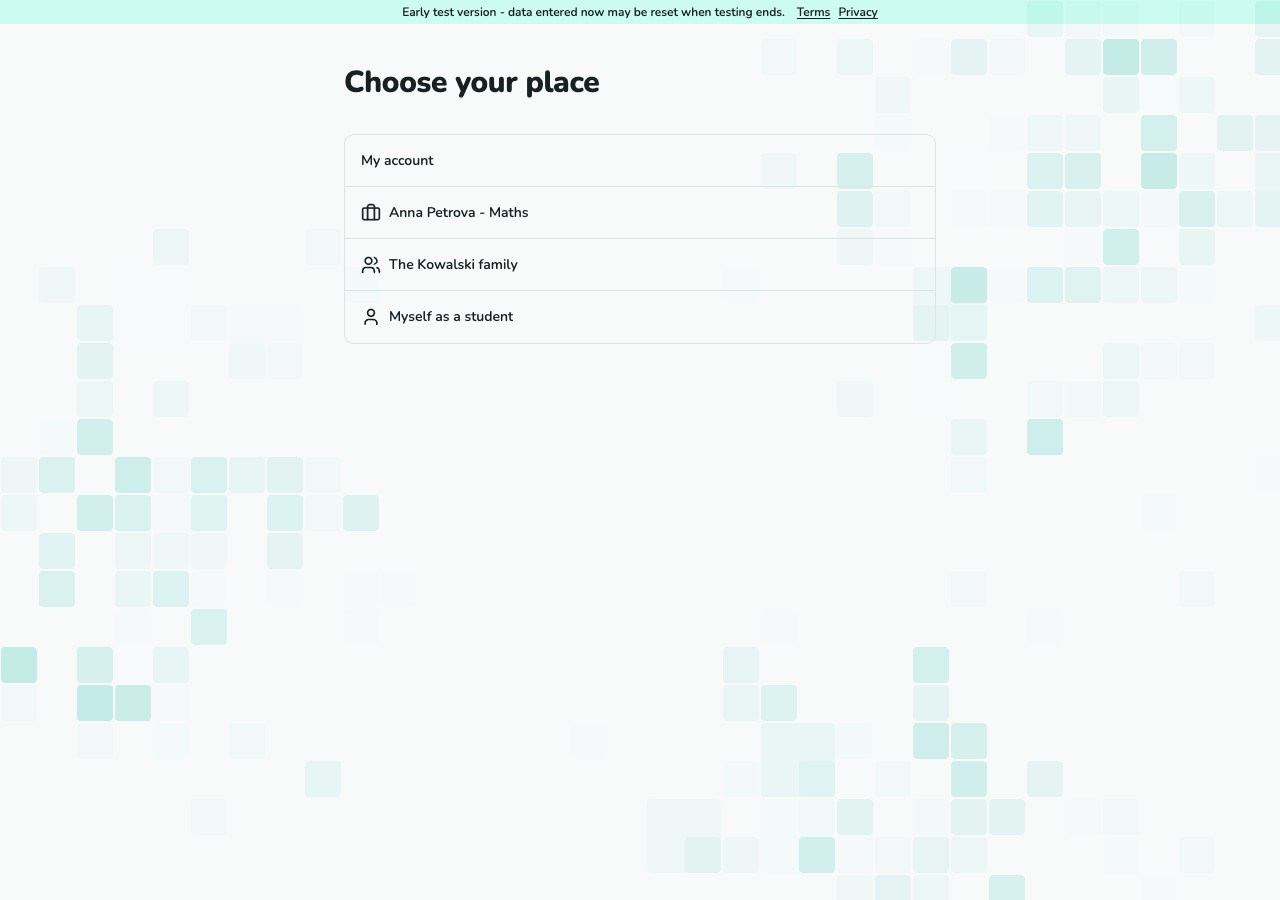
Screenshot not available yet.
Context switcher listing practice, family and student entries.
A-05 · Choose the context you need (desktop)
Answer a request to move a lesson
Review the proposed times
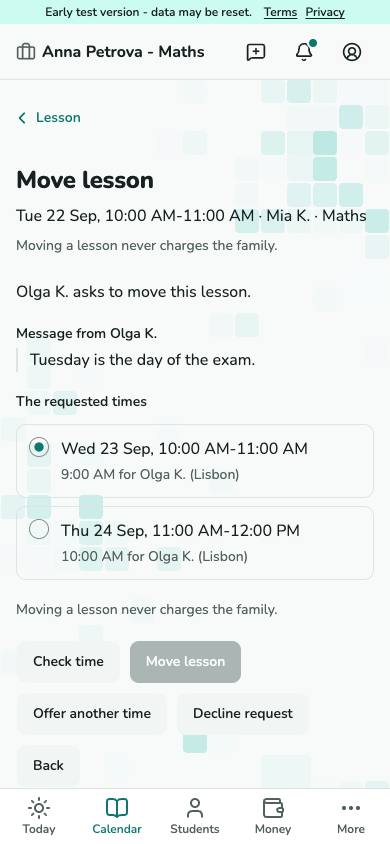
Open Move asked from Today. Read the family’s message and proposed times. Move to a free proposed time, decline with an optional message or offer another time. The old time stands until accepted.
Screenshot not available yet.
Tutor reschedule request with proposed times and response controls.
T-08 · Review the proposed times
Use your public page and requests
Publish your public page
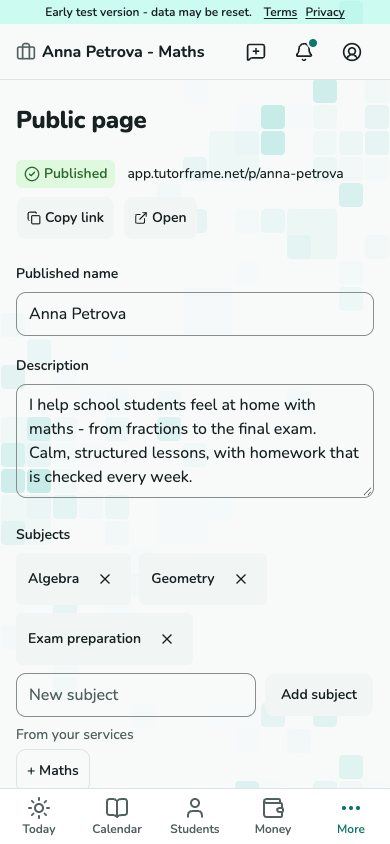
Open Public page. Check your description, subjects, contacts and address, then publish and share it. Visitors send requests; they do not see your private calendar.
Screenshot not available yet.
Public page editor with published address and profile fields.
T-29 · Publish your public page Work with a new request
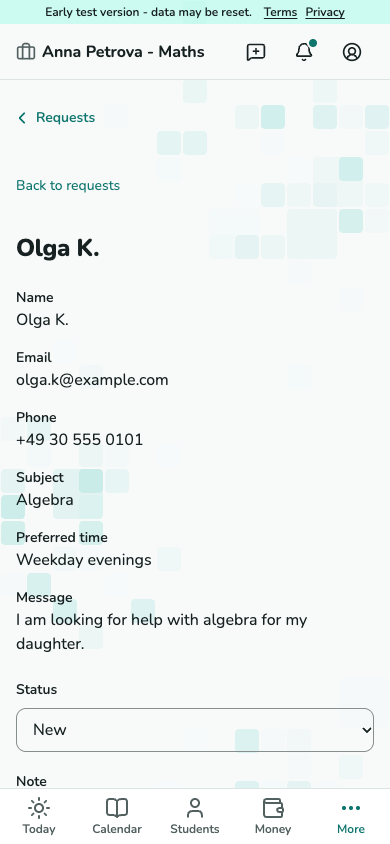
Open New request from Today or Requests. Contact the person outside TutorFrame, update the request’s status and notes, then add a new student or link a matching card. Schedule a trial from the resulting student card.
Screenshot not available yet.
Request detail with contact, status, notes and conversion controls.
T-30 · Work with a new request
Sell and manage a lesson package
Prepare a package template
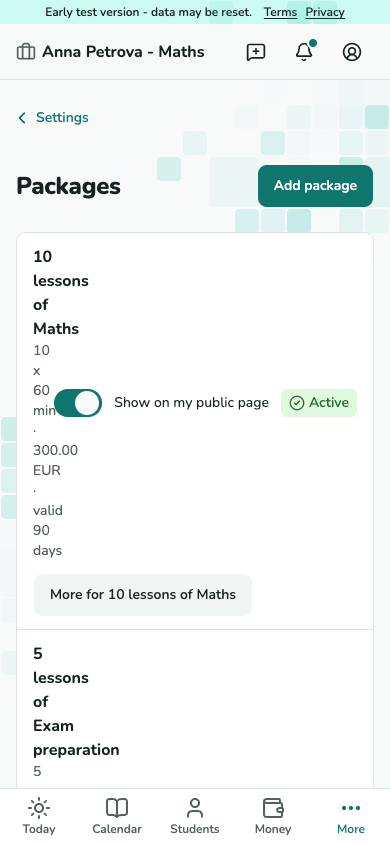
Open Settings - Packages. Add a template for the service with its units, price and term. A sold package keeps the terms you reviewed at sale.
Screenshot not available yet.
Package templates list with units, price and term.
T-26 · Prepare a package template Sell, then record the payment
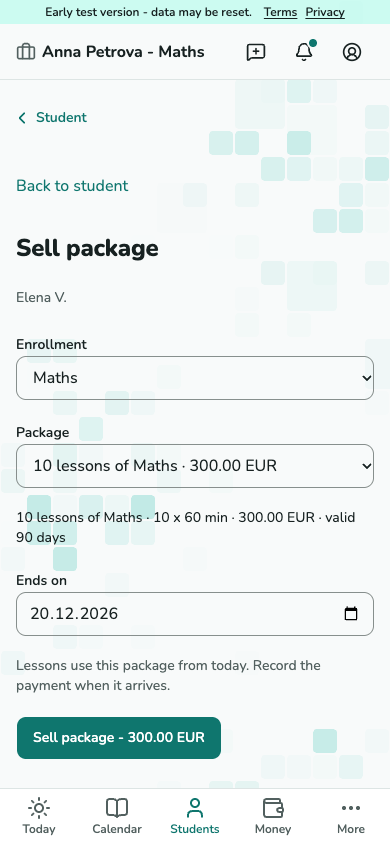
Choose Sell package on the student card. Check the enrollment, package snapshot and end date, then sell. Record the payment separately when money arrives.
Screenshot not available yet.
Sell package form showing snapshot and end date.
T-35 · Sell, then record the payment Check coverage, extend or refund
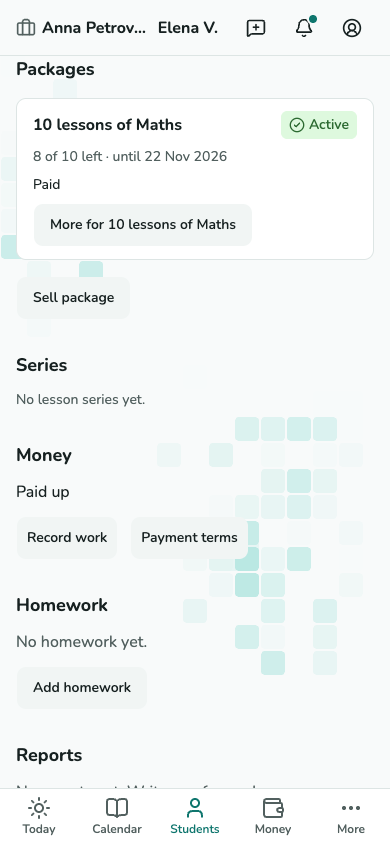
Packages shows remaining units and the end date. Its More menu lets you extend the end or preview a refund of unused units. Review the refund, method and reason before recording it.
Screenshot not available yet.
Student Packages section with remaining units and management menu.
T-11 · Check coverage, extend or refund
Open online booking for families
Set the booking rules
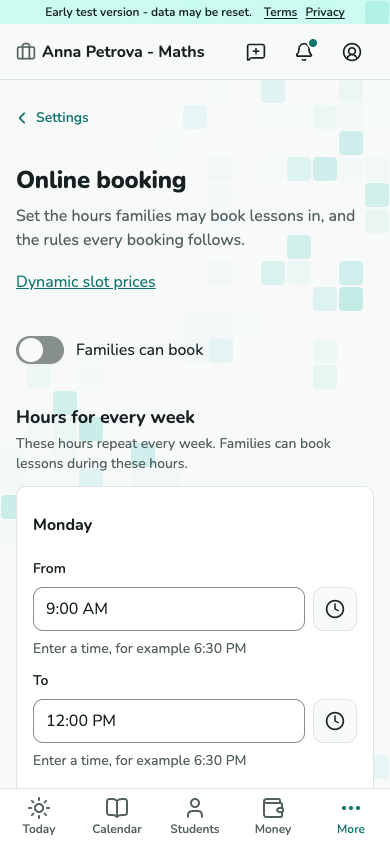
Open Settings - Online booking. Set working intervals, notice, horizon, gap and daily limits, then enable Families can book. Booking entries appear only when online booking is open for your practice.
Screenshot not available yet.
Online booking settings with working hours and limits.
T-33 · Set the booking rules
Set practice and savings goals
Save your plan
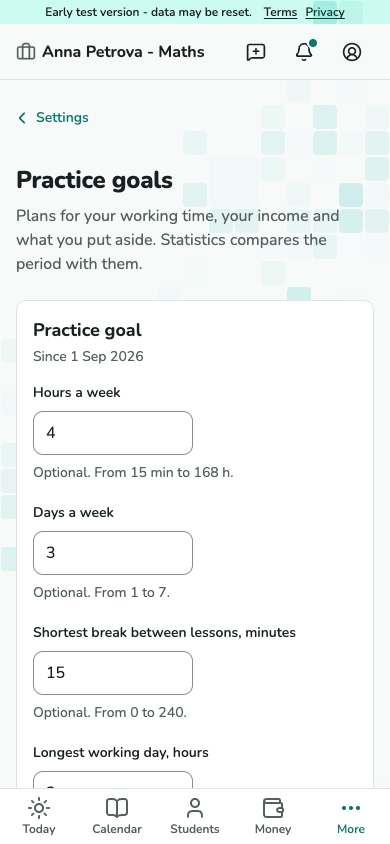
Open Settings - Practice goals. Set any working-hours, working-days, break, day-length and income targets. Add savings goals with the amount you have actually saved; these plans do not move money or block bookings.
Screenshot not available yet.
Practice goals screen with work targets and savings goals.
T-36 · Save your plan Compare the period with your plan
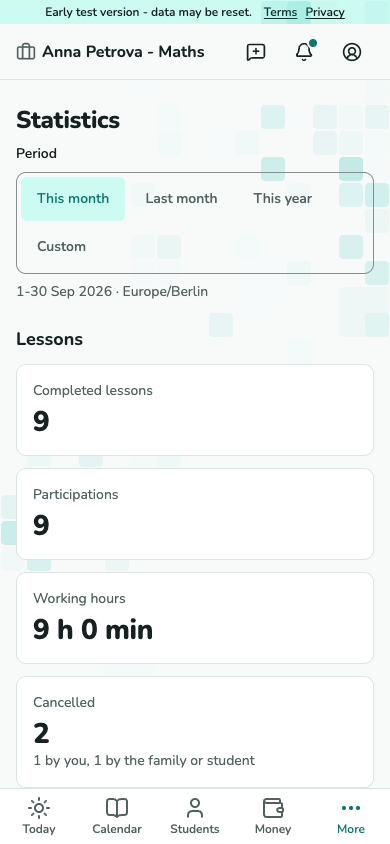
Open Statistics and choose the period. Plan and actual compares the goals in force for those dates with work and income; savings goals show their current state.
Screenshot not available yet.
Statistics screen with period selection and plan comparison.
T-24 · Compare the period with your plan
Write and share study-log entries
Write your own entry
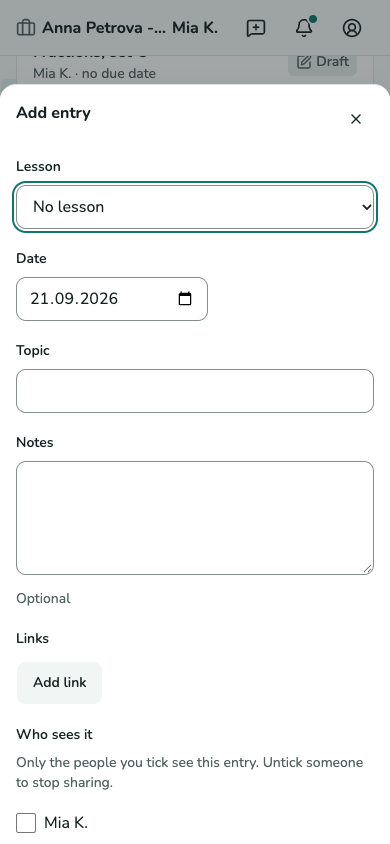
Open Study log on the student or lesson card and choose Add entry. Set the lesson if relevant, day, topic, notes and links. An entry stays private until you choose readers.
Screenshot not available yet.
Practice study-log entry dialog with topic, notes and reader choices.
T-11 · Write your own entry Check what is shared with you
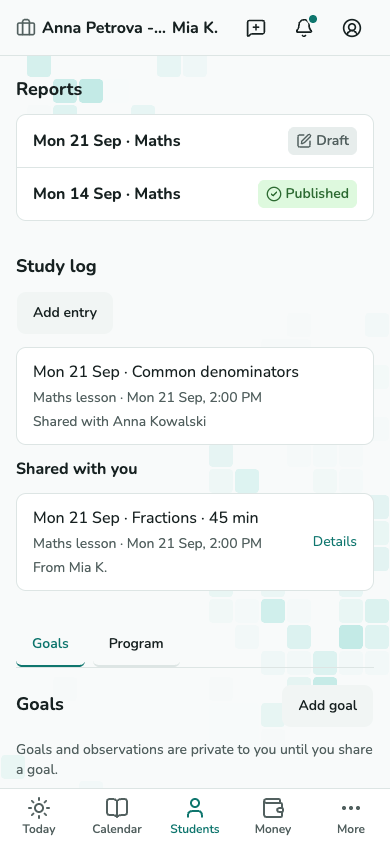
The Study log block keeps your entries separate from Shared with you. Choose eligible readers for your own entries; removing a reader stops sharing. Shared entries stop being readable when access ends.
Screenshot not available yet.
Student study-log block with own and shared entries.
T-11 · Check what is shared with you
Set a learning goal and record progress
Define the goal
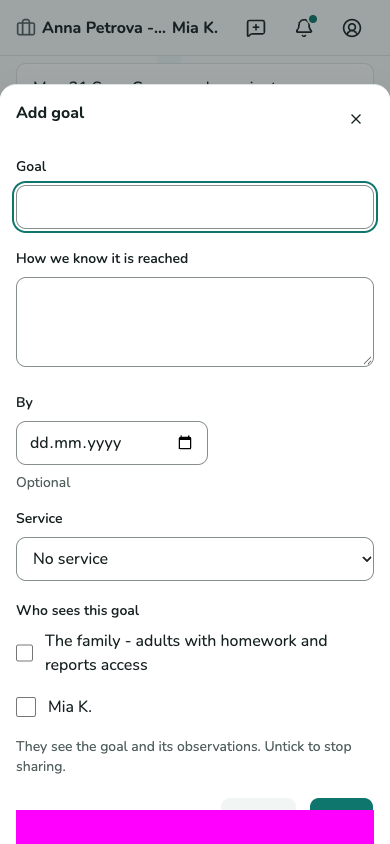
In Goals, choose Add goal. Write the goal and how you will know it is reached, with an optional deadline and service. Choose its audience explicitly; saving a goal does not grant anyone access.
Screenshot not available yet.
Learning goal dialog with criterion, deadline and sharing choices.
T-11 · Define the goal Record evidence, then assess
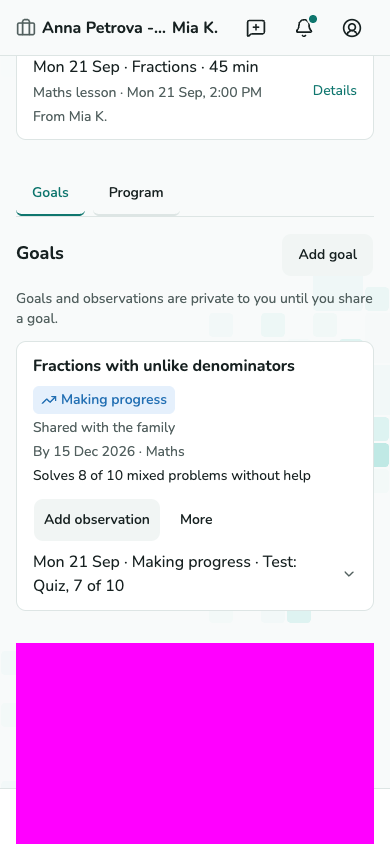
Choose Add observation on the goal to record a day, assessment and evidence. The chip follows the newest observation that counts. Lessons and attendance never mark a goal reached automatically.
Screenshot not available yet.
Goals section with assessment, criterion and observations.
T-11 · Record evidence, then assess
Offer a free-lesson program
Set the service’s program
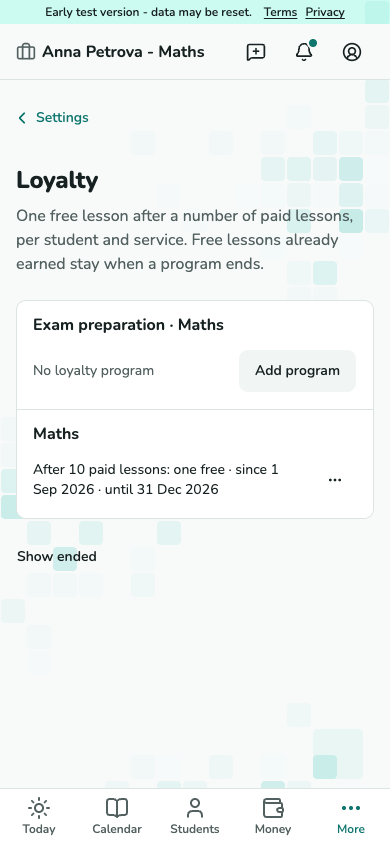
Open Settings - Loyalty. Add a program with the paid-lesson threshold and its dates. The rule stays fixed; use a new program for a different rule.
Screenshot not available yet.
Loyalty programs showing service and paid-lesson threshold.
T-26 · Set the service’s program Check the free lesson at closing
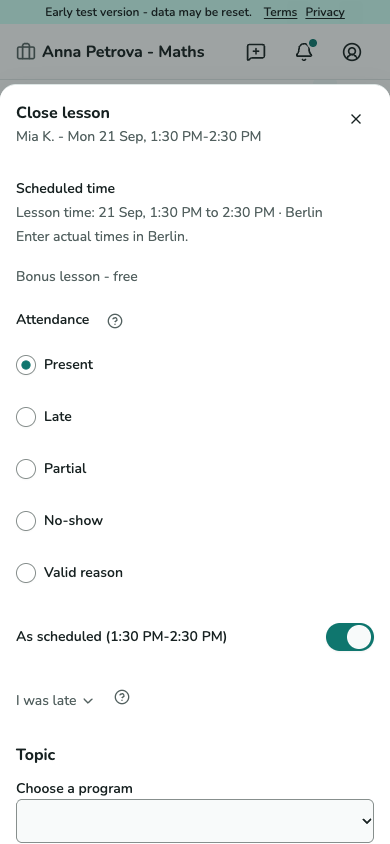
The student card shows progress. A qualifying close issues the reward, and the next qualifying lesson is free. Review the close sheet’s bonus line; corrections can change counts and may require a decision on Today.
Screenshot not available yet.
Close sheet showing the bonus lesson and zero base charge.
T-06 · Check the free lesson at closing
Create and close a group lesson
Create the group
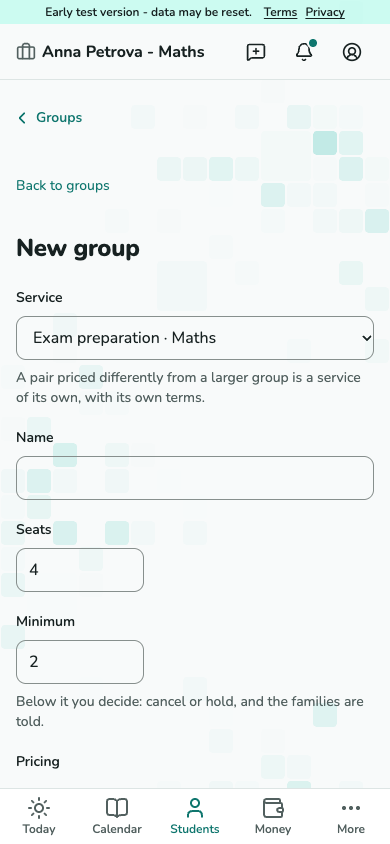
Open Students - Groups - Add group. Choose an active service, name, seats, minimum and whether students may book seats. Save, then add members who have a live enrollment in that service.
Screenshot not available yet.
New group form with service, capacity and minimum.
T-39 · Create the group Schedule for the members
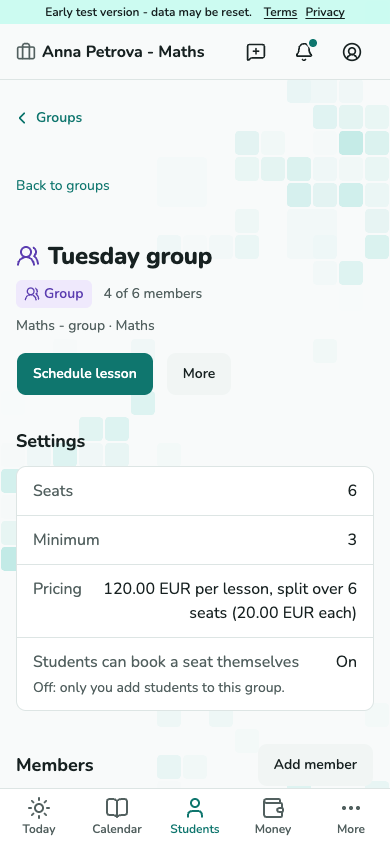
Review the group’s members and choose Schedule lesson. The result names any member left out. On the lesson card, each participant has their own seat and money line.
Screenshot not available yet.
Group detail with members and scheduling action.
T-38 · Schedule for the members Decide whether an underfilled lesson goes ahead
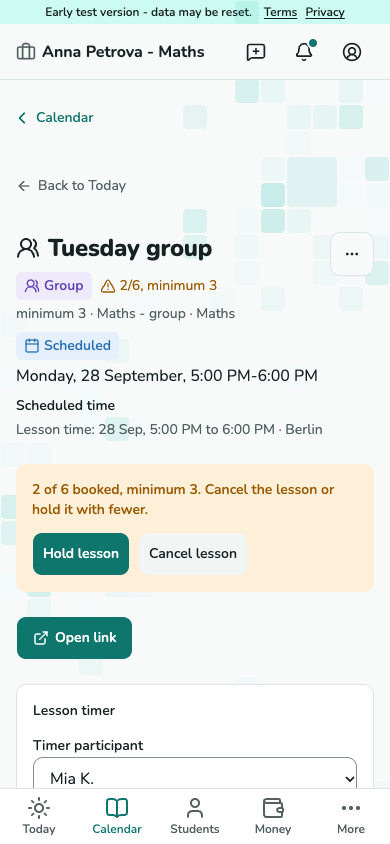
After the booking deadline, a group below its minimum needs your decision. Open its lesson and choose Hold lesson to go ahead with fewer, or Cancel lesson. The families are told either way.
Screenshot not available yet.
Group lesson with two booked participants, a minimum of three and the Hold lesson decision.
T-05 - decide whether to hold an underfilled group lesson. Close once, assess each student
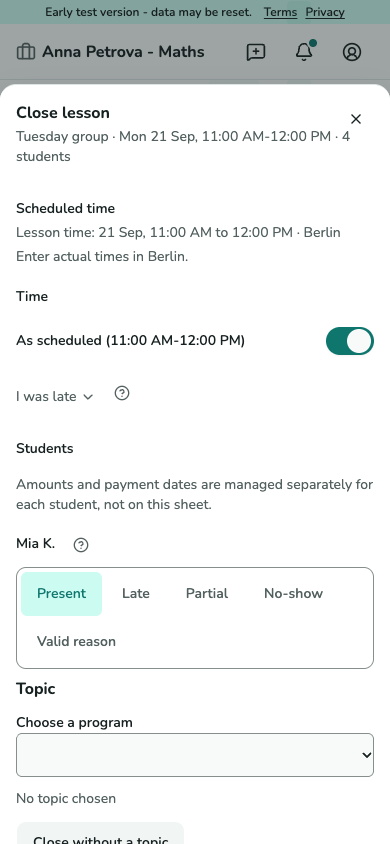
Choose Close lesson. Record the shared time once and attendance for each participant, then check each charge and the total. If someone joined or left meanwhile, reload before confirming.
Screenshot not available yet.
Group close sheet with shared time and one attendance row per participant.
T-06 · Close once, assess each student
Manage the waiting list
Review requests and offers
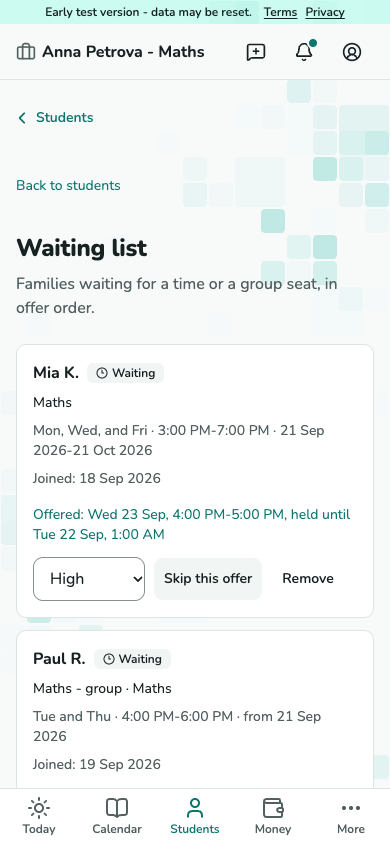
Open Waiting list from Students. Set a request’s priority, skip a current offer or remove an entry after reading the confirmation. Skipping keeps the entry; removing ends it and any offer.
Screenshot not available yet.
Tutor waiting list showing priority and current offers.
T-40 · Review requests and offers
Record work and income
Choose a lesson or other work
For a lesson already in your schedule, choose Close a scheduled lesson, filter by student or date and select the exact lesson. Other work creates a separate entry. Without a client, that entry records money already received and creates no debt. After saving, choose Record another, or continue from Record work on Today.
Screenshot not available yet.
Record work with two choices: Close a scheduled lesson and Record other work.
T-45 - Record work Record work that was not a lesson
Use this for work you are paid for that was not a lesson, for example preparing materials, a consultation or checking an essay. Open Record work from Today, from a free half-hour in the calendar or from a student's page, choose Record other work, then enter the amount and the date. A description, a time and a note are optional. If the work was for one of your students, choose them as the client: the line under the form then says what happens to the money, for example that the client now owes the amount, that an advance already covers it, or both. Tick Paid now only if the money has already arrived; leave it empty to record what the client owes and add the payment later. Then choose Record.
Screenshot not available yet.
Record work form with amount, date, description, client and a line showing who pays and what is due.
T-45 - Record work Add income that has no client
Open Money and choose Add income. Enter the amount, date and a description, and leave the client empty: nobody owes it, and it is recorded as money received that day. Open More for a client, a time, a note or Paid now.
Screenshot not available yet.
Add income form on the Money page with amount, date and description, and a More section.
T-16 and T-45 - Add income Correct the amount of an entry
Open the entry from its calendar tile, a statement row or the Open it button in the confirmation after saving. Choose Correct amount, enter the new amount and a reason, and read what it will do before you save. To change the words, time or note, choose Edit. A wrong date or client is corrected to zero and recorded again.
Screenshot not available yet.
Recorded work page with Correct amount, the consequence line and a reason field.
T-46 - Correct the amount of an entry